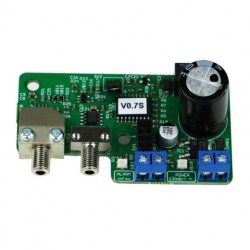
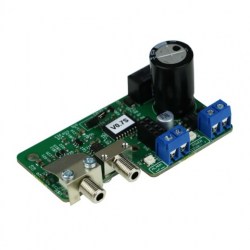
PV Solar anti-theft security system SOLAR SENTRY 4G
SOLAR SENTRY 4G - 2 string (2x500V) PV solar security system with battery and 4G communicator
Solar Sentry was developed to protect solar panels, thanks to which we can receive notifications in case of theft or circuit break/short circuit both during the day and at night. It also monitors whether the voltage is coming through the strings, so it can indicate if the circuit is correct but no voltage is coming from the solar cells.
- 2 pcs SOLAR inputs (STRING)
- Input max. 500VDC/STRING
- 2 pcs potential-free SOLAR circuit alarm outputs (SOLAR1 and SOLAR2)
- Life sign output feedback - Open Collector (OC) output max. with 20V voltage (NO/NC)
- Battery operation feedback - Open Collector (OC) output max. with 20V voltage (NO/NC)
- Tamper output feedback - Open Collector (OC) output max. with 20V voltage (NO/NC)
- 1 pcs tamper input (dry contact)
- Assembled in an IP65 box with MC4 connectors
- the device contains 1pc ProBattery2000, which can be expanded with one more piece (max. 2pcs)
- SMS and voice messages sending to 8 phone numbers
- the input signals are sent to the monitoring station in a Contact ID message with a voice call and GPRS/3G/4G data communication
Description
The Solar Sentry product was developed to protect solar panels. We can receive a notification in case of theft or circuit break/short circuit. The device's task is to notify if there is a short circuit or a break on the strings (max. two strings/device) during the day or at night. Solar Sentry also monitors whether the voltage is coming through the strings, so it can indicate if the circuit is correct, but no voltage is coming from the solar cells. If the circuit of the solar panels is broken or short-circuited, a signal is generated at the RELAY output, which can be used to signal any device. It can be combined particularly well with our GSM/4G communication devices (ProCon GSM Cloud and ProCon 4G Cloud), in which case it is also possible to send SMS, voice message, Contact ID to the monitoring station, e-mail, and push messages. We can differentiate the signs and provide unique messages.
Power Supply
The system works from a single 2000mA internal battery, which can operate for 4-6 days (optional). Possible to connect another 2000mA battery if required to double the standby time. The device can be used with the ProBattery 2000 battery. We can provide power for the system with an external 12VDC power supply. 12VDC 800mA, minimum 1.2kV breakdown voltage power supply can be connected. The internal battery is charged automatically. The device takes the charging voltage from the SOLAR1 circuit.
Standby current consumption: 3.7V/2.8mA @ 0.01W Charging the internal battery is possible even in cloudy weather, even before the inverter starts.
Communication channels of the device:
- 1 pc SOLAR1 alarm output, potential-free relay
- 1 pc SOLAR2 alarm output, potential-free relay
- 3 pcs open collector output max. with a voltage of 20V:
- Life signal output (NC default position, NO in alarm)
- Trouble output (48 hours monitoring and battery check, NO)
- Tamper output (in case of a signal to the tamper input, NO)
- 1 pc Tamper input (dry contact can be connected to it. It can be an opening sensor or even a loop.)
4G communication
The Solar Sentry 4G can also be ordered with a GSM module, so when integrated with the ProCon 4G module, the alarm center and communication are also provided:
- you can send the incoming signals to 5 inputs to 8 phone numbers in the form of SMS and voice messages
- SMS text, voice message, Contact ID can be entered per input
- the input signals are sent to the monitoring station in a Contact ID message with a voice call and GPRS/3G/4G data communication (SIA DC09 or Enigma)
- can be armed/disarmed as an alarm center, by SMS, voice call, SMS button from the Cloud Manager application
- sending a life test message from the GSM module; 16,000 event logs; controllable from 1,000 phone numbers
- cloud connection for remote access and status query as well as application connection for output(s) control, output/input status display
- with EXP Alarm extension, you can control an outdoor siren; get feedback about the status of the module (Armed/disarmed);
LED signals
The red LED (ACU_LED) next to the battery lights up, indicating that it is probably necessary to replace the internal battery. The system cannot report a bad battery if an external power supply is used. The LEDs at the terminals show the signals of the corresponding outputs, and the LED lights up when active.
ACT LED: Device status indicator flashes once during measurement.
SOLAR LED: If voltage is detected at any SOLAR input, the SOLAR LED turns on. If both SOLAR inputs are inactive, it turns off (voltage below 10V)
Device activation process
Connect the internal battery or external power supply to the Solar Sentry device, then replace the box lid. Connect the solar circuits. We always start the connection with the SOLAR1 circuit and only connect the SOLAR2 circuit if the string has already been connected to the SOLAR1 circuit (otherwise, the system will not work). At start-up, the SOLAR2 circuit remains switched off until the SOLAR2 circuit receives voltage. Only after this the SOLAR2 circuit will be enabled automatically. So if the SOLAR2 circuit is not used, i.e. it will never receive voltage, then the SOLAR2 circuit will not be enabled (it will not be activated). The connectors of the unused SOLAR circuit must be short-circuited with a wire. This is also important to ensure IP65 protection.
Installations steps
1. Switch off / disconnect the SOLAR inverter (using the steps in the inverter description)
2. Turn off the DC de-energizer switch
3. Make the wiring for receiving the output signals
4. Connect the internal battery or the external power supply to the Solar Sentry
5. Cover the top of the box with the lid
6. Connect the solar panels to the device
WATCH OUT FOR HIGH DC VOLTAGE! Even though there is a DC power cut, the voltage can still come from the solar panels!
7. Connect the device to the inverter.
8. Switch on the inverter as user manuals described (usually DC on, then AC on)
Steps to open a box
1. Turning off the solar system.
2. Disconnecting PV- PV+ connectors
3. Disconnecting INV- INV+ connectors
4. Unscrewing and opening the box lid.
Checking the operation of the device
The optimal installation time of the device is in the afternoon before sunset, so we install and switch on the device before sunset so that the SOLAR channels are activated. You need incoming light. We wait for complete darkness, of course, for safety reasons, we switch off the solar system (on the DC and AC side) and then interrupt the solar circuit to be tested (we can do this for solar panels on the roof or pull it out of the device). The alarm output should be activated within 1 minute, and then it will return to normal status when reconnected. If you want to check the operation in the sun, the same procedure is followed, but with extra attention, all DC High-Voltage instructions are followed.